HOW TO TIE THE TRINITY KNOT
THE TRINITY KNOT(WATCH)

ABOUT THE TRINITY KNOT
KNOT SIZE 4/5
SYMMETRY 1/5
DIFFICULTY 5/5
NERD FACTOR 4/5
THE TRINITY KNOT TYING INSTRUCTIONS

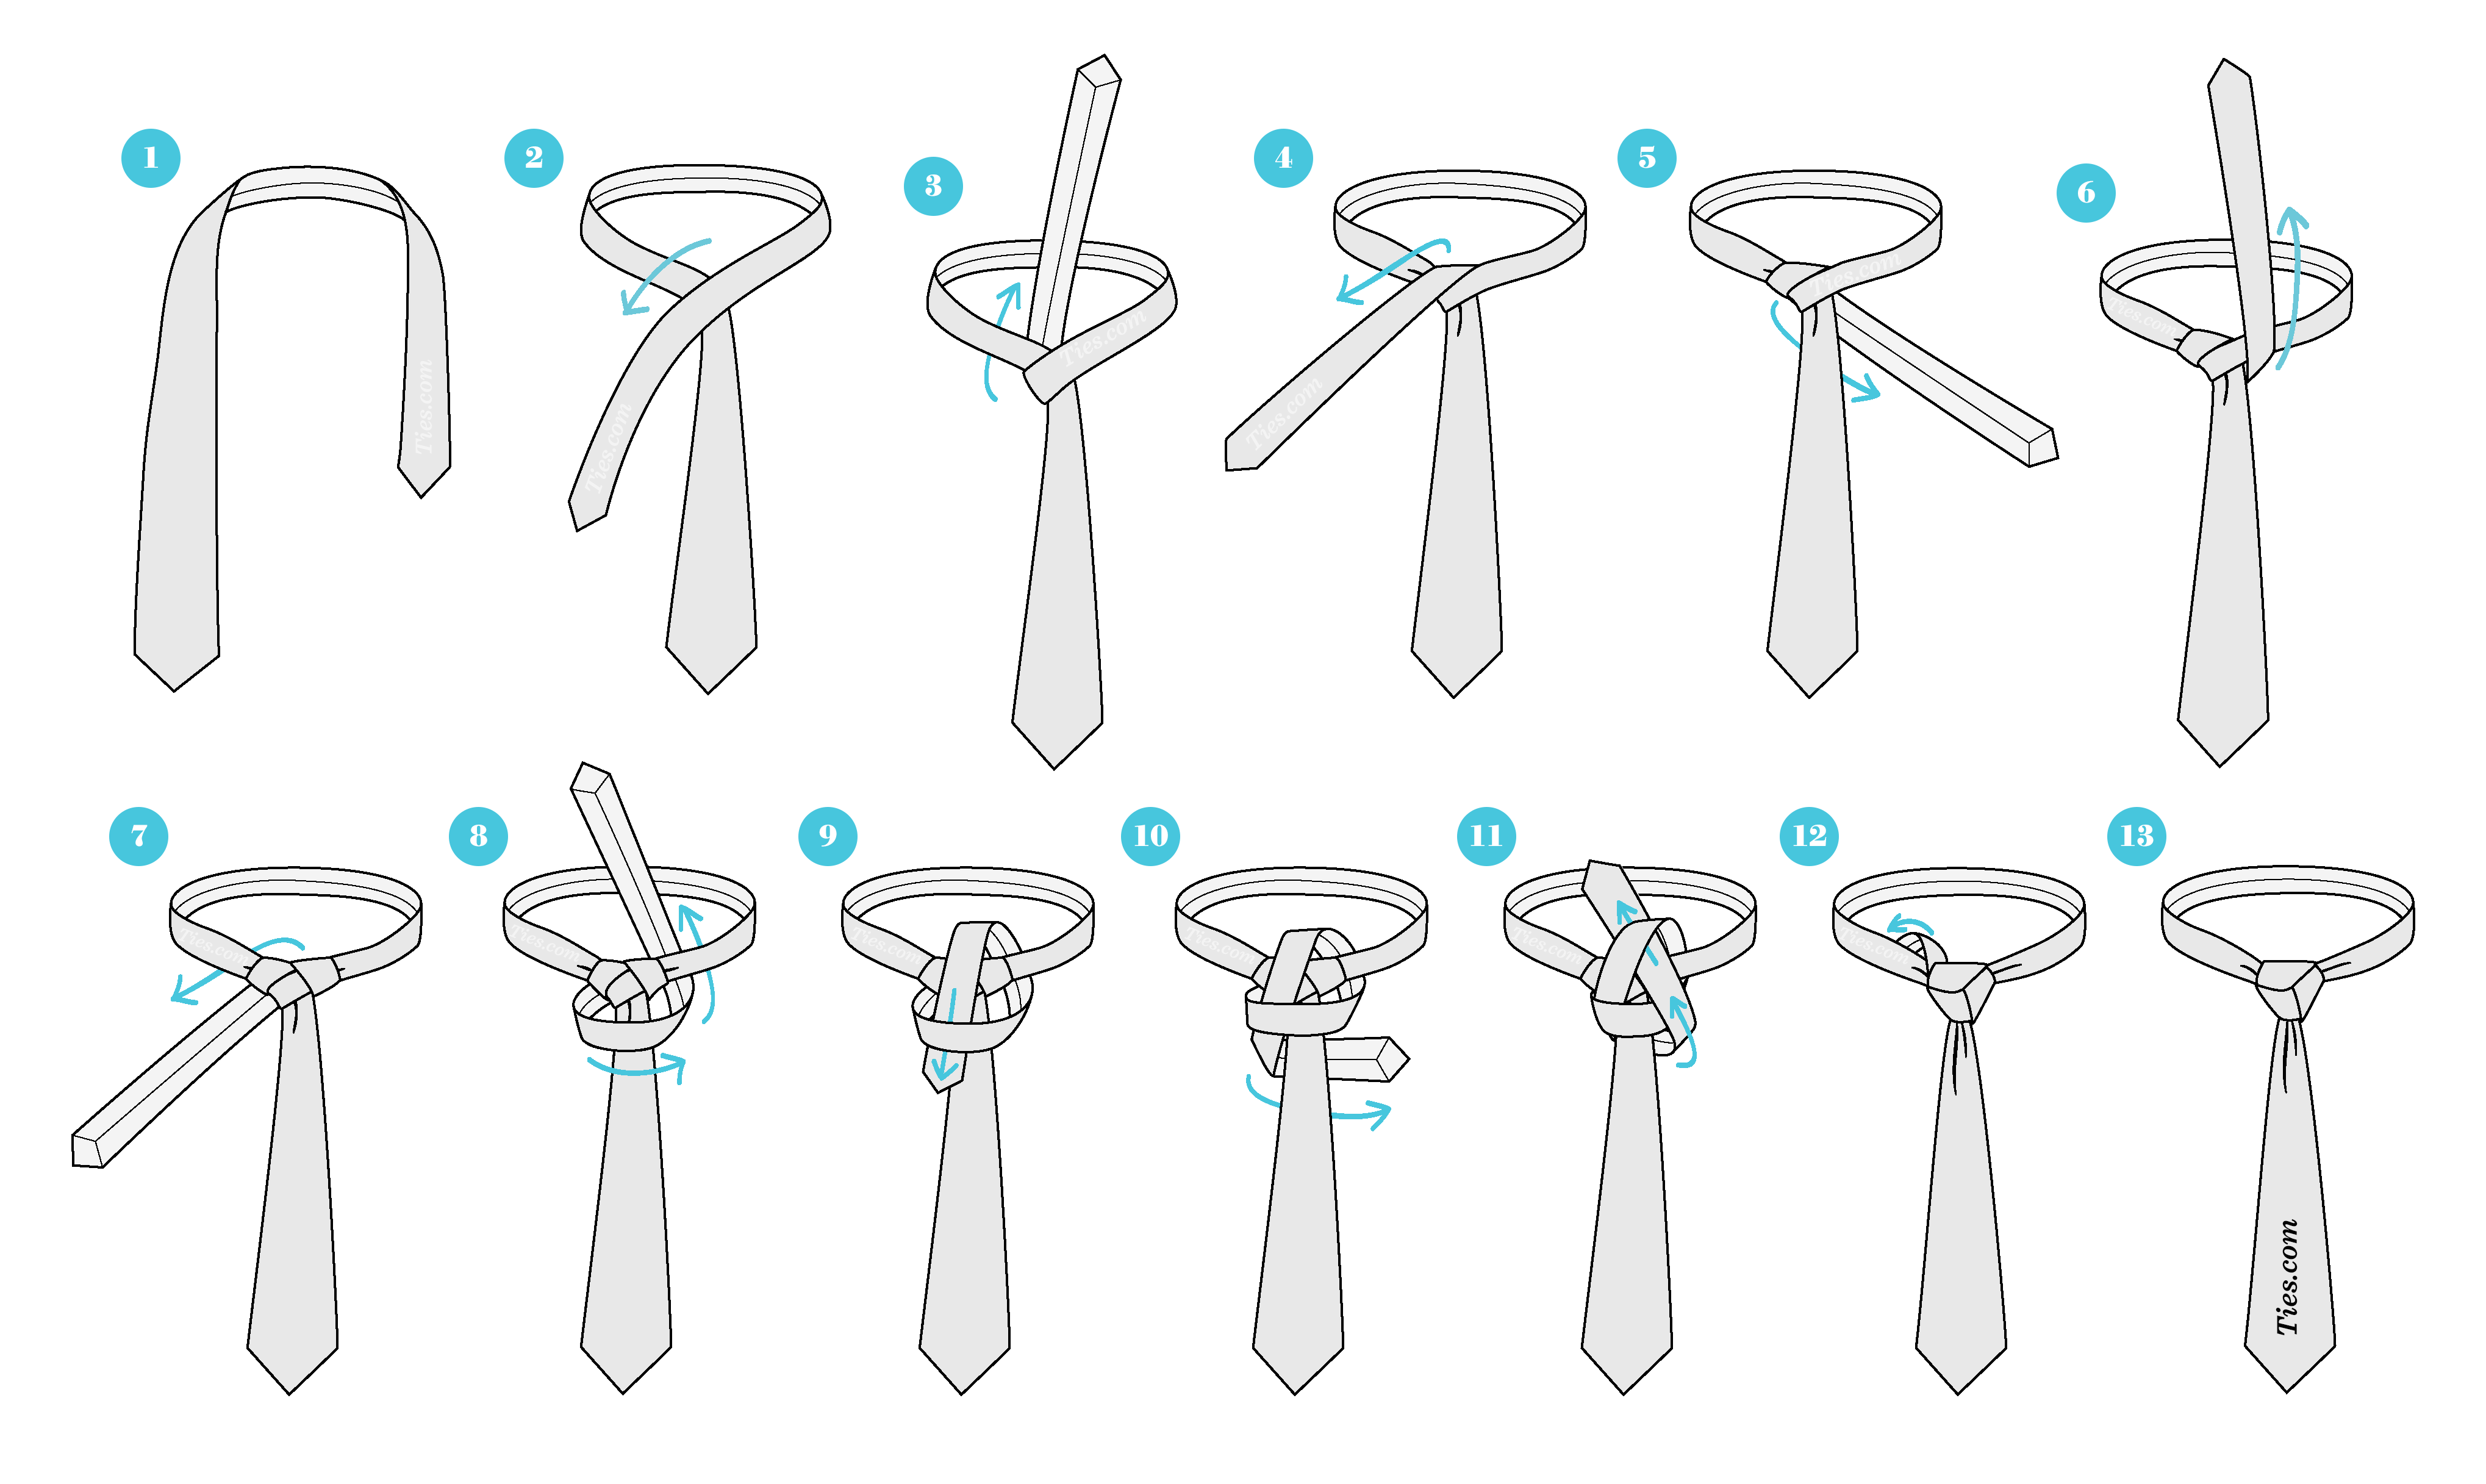
1. Start with the wide end of the tie on the left and the small end on the right. The tip of the wide end should rest at the top of your belt buckle. Only move the active (small) end.
2. Over the wide end to the left.
3. Up into the neck loop from underneath.
4. Down to the left.
5. Around the back of the wide end to the right.
6. Up to the center, towards neck loop.
7. Through the neck loop and down to the left.
8. Across the wide end to the right. Up into the neck loop from underneath.
9. Down through the loop you created in the previous step. Keep loose.
10. Bring the small end around the back of the wide end to the right.
11. Bring it across the front towards the center and through the loop created in the previous step.
12. Tighten and tuck the rest of the small end behind neck loop on the left side.
13. Hypnotize the throngs of onlookers.

ABOUT THE TRINITY KNOT
The Trinity knot, much like the Eldredge knot, is a relatively recent innovation. The finished knot shares a resemblance with the Celtic Triquetra knot. Tied using the small end as the active end, this knot is initially tied loosely and pulled tight at the very end. The Trinity produces a rounded shape that is slightly asymmetrical, slightly larger than the Windsor knot and is visually striking. All who gaze upon the trinity knot will worship her.
KNOT SIZE 4/5
SYMMETRY 1/5
DIFFICULTY 5/5
NERD FACTOR 4/5
THE TRINITY KNOT TYING INSTRUCTIONS

1. Start with the wide end of the tie on the left and the small end on the right. The tip of the wide end should rest at the top of your belt buckle. Only move the active (small) end.
2. Over the wide end to the left.
3. Up into the neck loop from underneath.
4. Down to the left.
5. Around the back of the wide end to the right.
6. Up to the center, towards neck loop.
7. Through the neck loop and down to the left.
8. Across the wide end to the right. Up into the neck loop from underneath.
9. Down through the loop you created in the previous step. Keep loose.
10. Bring the small end around the back of the wide end to the right.
11. Bring it across the front towards the center and through the loop created in the previous step.
12. Tighten and tuck the rest of the small end behind neck loop on the left side.
13. Hypnotize the throngs of onlookers.
SOURCE: THE GENTLEMANUAL
Comments
Post a Comment