HOW TO TIE THE BALTHUS KNOT
THE BALTHUS KNOT(WATCH)

The Balthus knot was invented circa 1930 by Balthus (Balthasar Klossowski), a controversial Polish-French modern artist. The Balthus knot is as large as necktie knots come (significantly bigger than the Windsor). When executed properly, the resulting knot is a broad and conical in shape. Because of the sheer number of times the wide end is wrapped around the small end, the finished tie will be very short when completed. Get controversial with this artsy knot.
KNOT SIZE 5/5
SYMMETRY 5/5
DIFFICULTY 4/5
NERD FACTOR 5/5
INVERTED TAIL
THE BALTHUS KNOT TYING INSTRUCTIONS

BALTHUS KNOT STEP-BY-STEP GUIDE
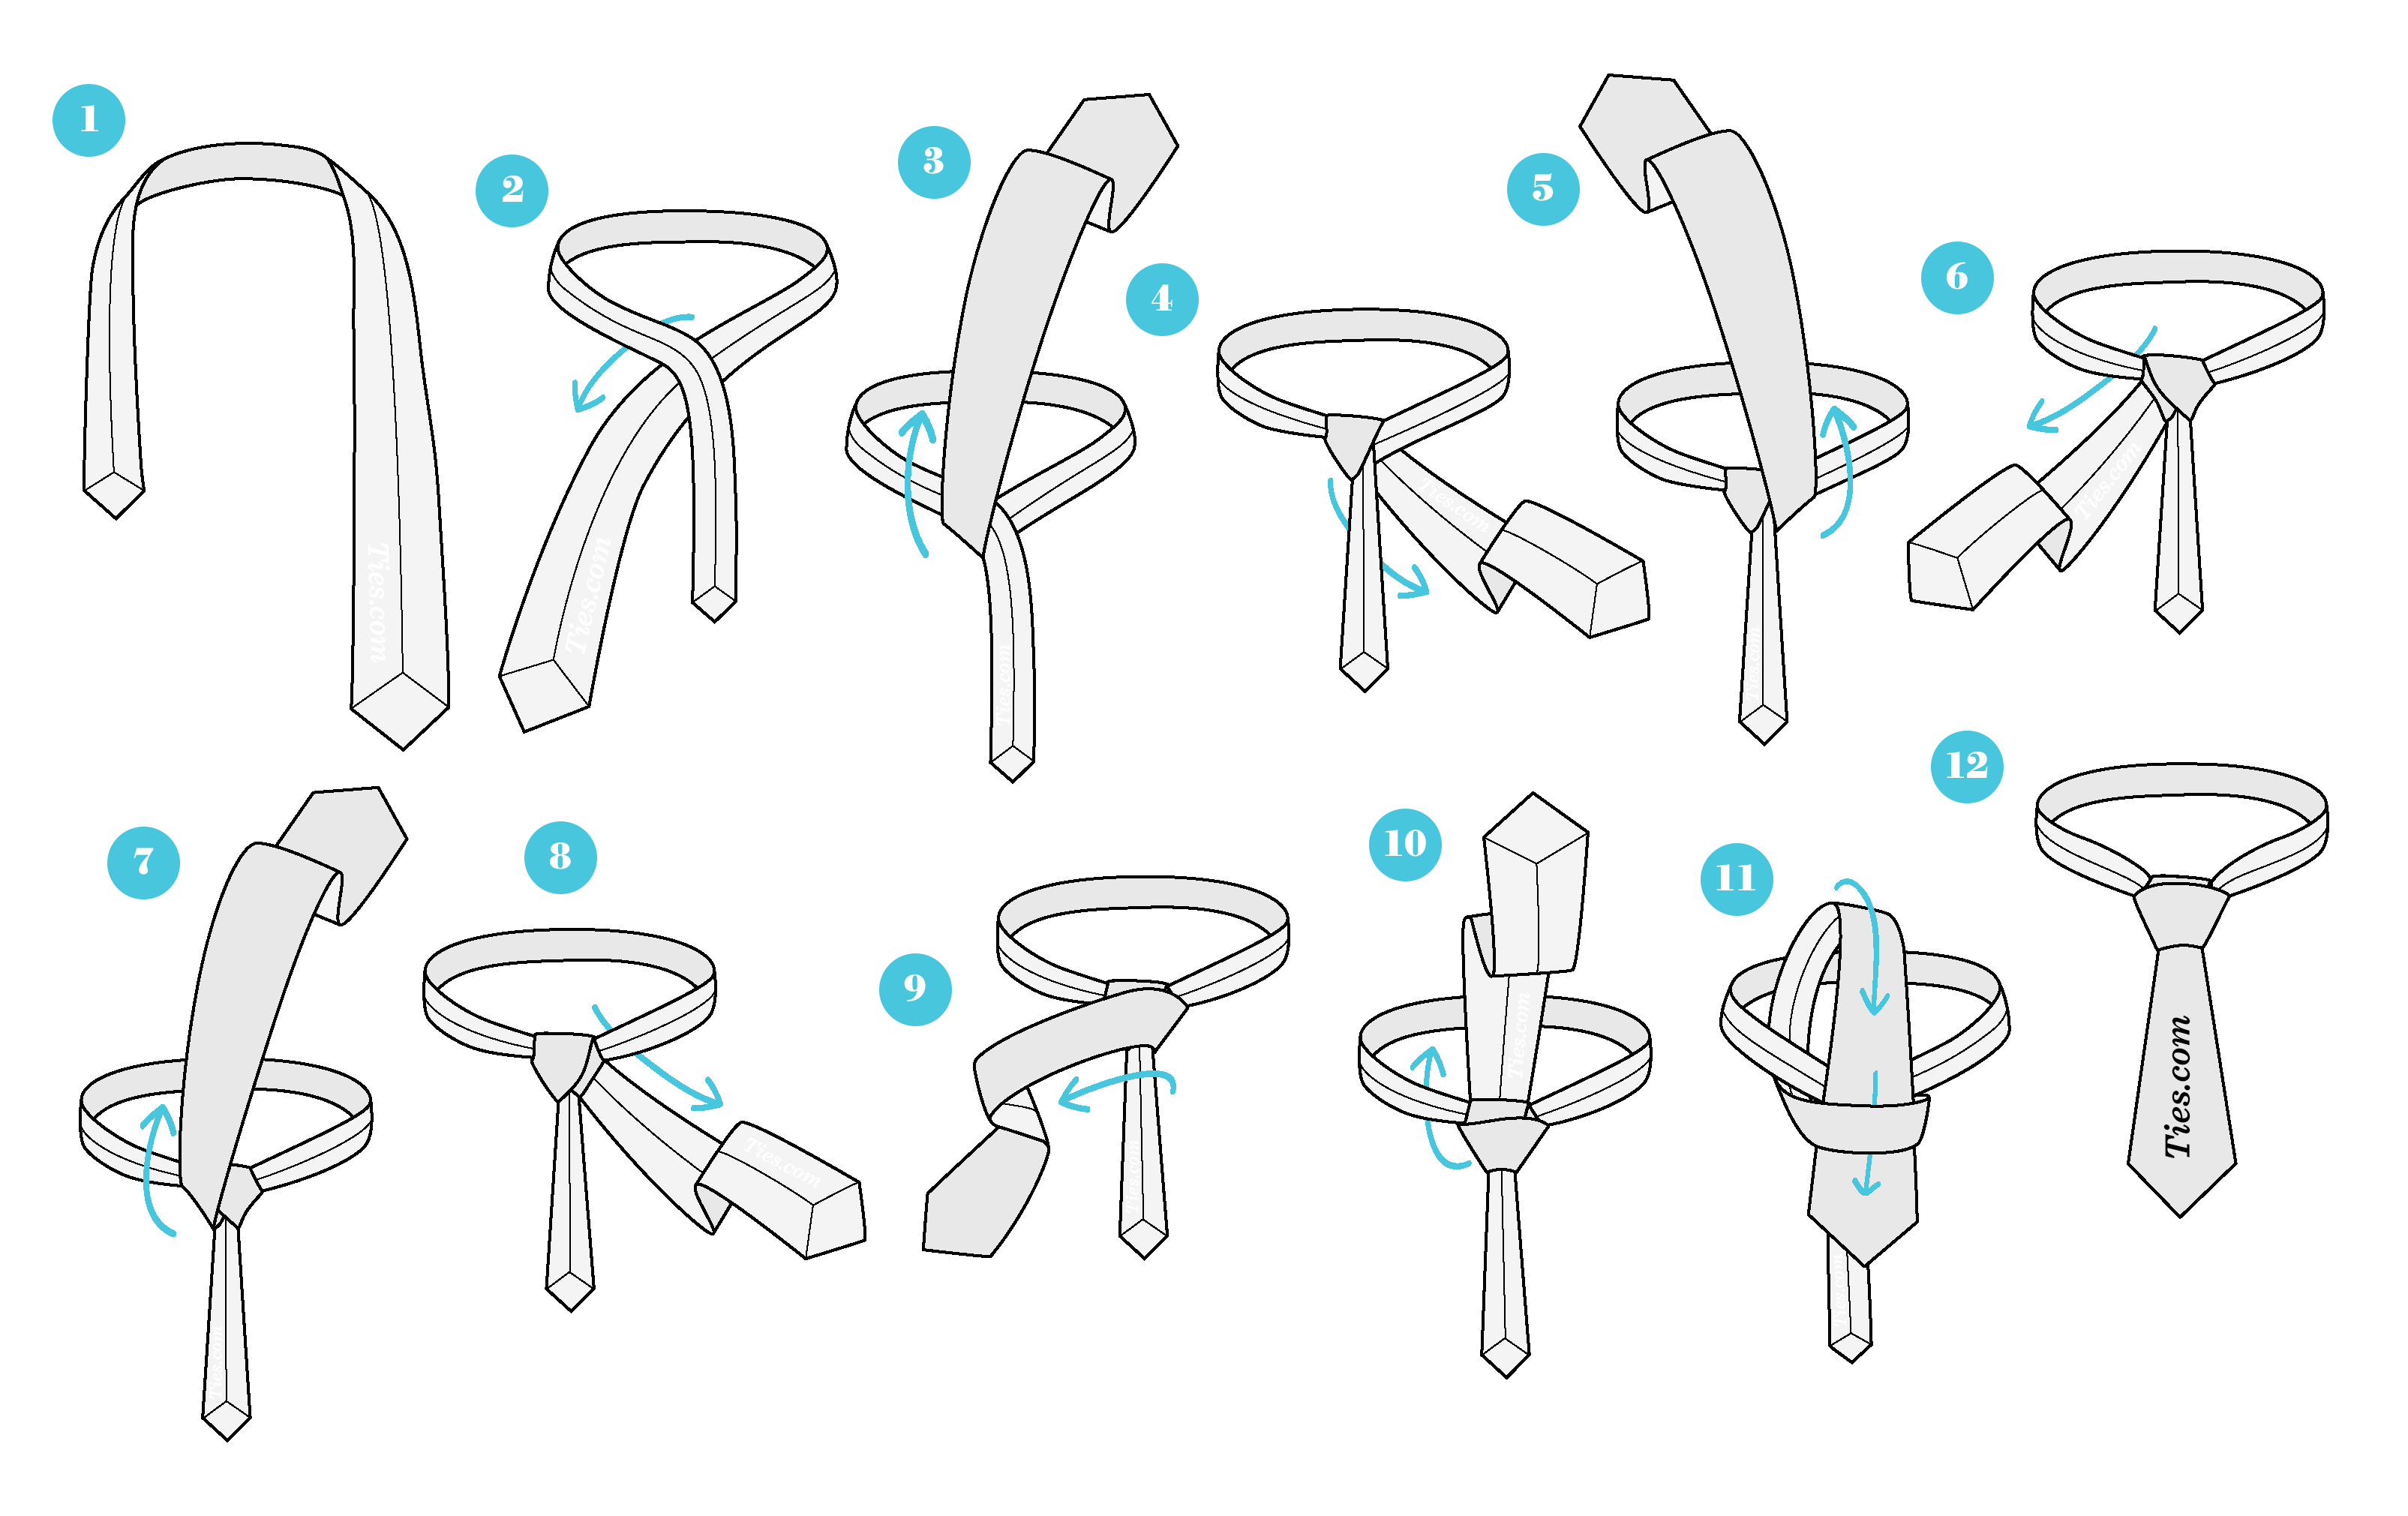
STEP 1 - Begin with the backside of your tie facing forward with the wide end of the tie on the right and the small end on the left.
STEP 2 - Wide end under the small end to the left.
STEP 3 - Up to the center, towards the neck loop.
STEP 4 - Through the neck loop and down to the right.
STEP 5 - Up to the center, towards the neck loop.
STEP 6 - Through the neck loop and down to the left.
STEP 7 - Up to the center, towards the neck loop.
STEP 8 - Through the neck loop and down to the right.
STEP 9 - Across the front of the small end to the left.
STEP 10 - Up into the neck loop from underneath.
STEP 11 - Down through the loop you've just made in the front.
STEP 12 - Pull down on the wide end to tighten. Slide the knot up to adjust.
SOURCE: THE GENTLEMANUAL

ABOUT THE BALTHUS KNOT
The Balthus knot was invented circa 1930 by Balthus (Balthasar Klossowski), a controversial Polish-French modern artist. The Balthus knot is as large as necktie knots come (significantly bigger than the Windsor). When executed properly, the resulting knot is a broad and conical in shape. Because of the sheer number of times the wide end is wrapped around the small end, the finished tie will be very short when completed. Get controversial with this artsy knot.
KNOT SIZE 5/5
SYMMETRY 5/5
DIFFICULTY 4/5
NERD FACTOR 5/5
INVERTED TAIL
THE BALTHUS KNOT TYING INSTRUCTIONS

BALTHUS KNOT STEP-BY-STEP GUIDE
STEP 1 - Begin with the backside of your tie facing forward with the wide end of the tie on the right and the small end on the left.
STEP 2 - Wide end under the small end to the left.
STEP 3 - Up to the center, towards the neck loop.
STEP 4 - Through the neck loop and down to the right.
STEP 5 - Up to the center, towards the neck loop.
STEP 6 - Through the neck loop and down to the left.
STEP 7 - Up to the center, towards the neck loop.
STEP 8 - Through the neck loop and down to the right.
STEP 9 - Across the front of the small end to the left.
STEP 10 - Up into the neck loop from underneath.
STEP 11 - Down through the loop you've just made in the front.
STEP 12 - Pull down on the wide end to tighten. Slide the knot up to adjust.
SOURCE: THE GENTLEMANUAL
SOURCE: THE GENTLEMANUAL
Comments
Post a Comment